Customer
Managing the customer side of your business is crucial for smooth operations. Ace CBM tools simplify this process, so users don't have to handle complex tasks manually. With streamlined features for tracking customer interactions, managing orders, and automating follow-ups, Ace CBM helps you focus on growth instead of administrative burdens.
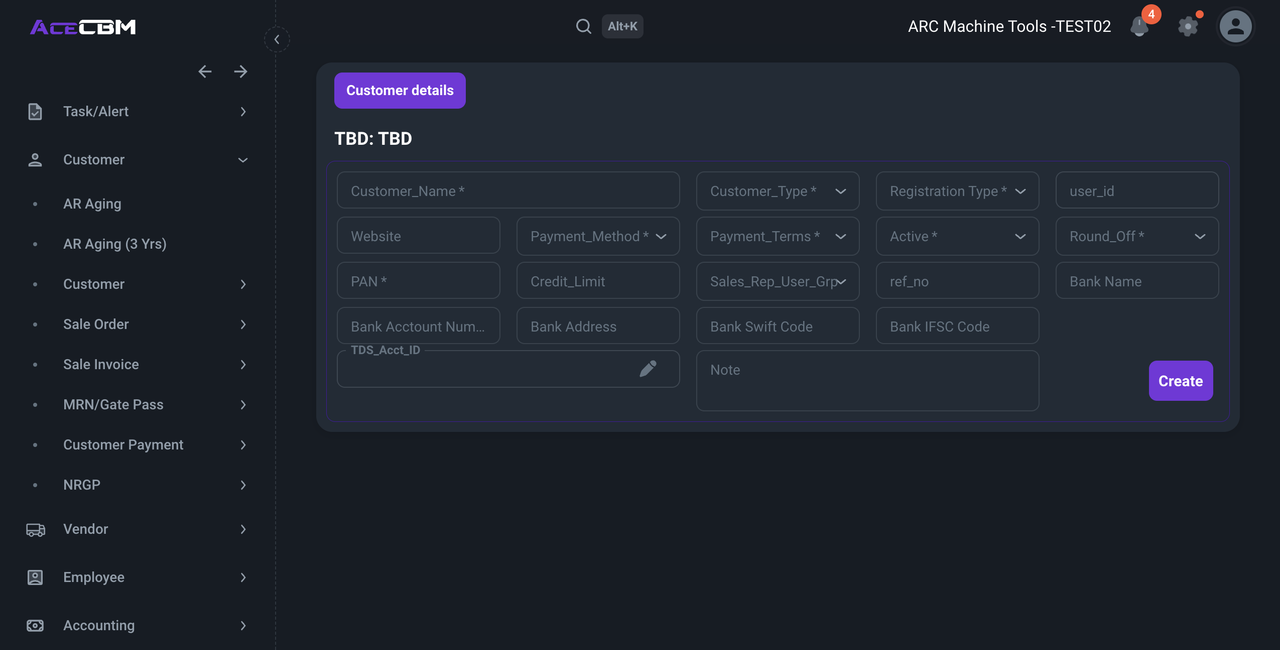
Adding a New Customer
-
Access Customer Form: In the Ace CBM dashboard, navigate to the "Customer" section.
-
Fill in Customer Details:
- Customer Name: Enter the name of the customer.
- Website: Provide the customer’s website URL, if available.
- PAN: Enter the Permanent Account Number (PAN) for tax identification (mandatory).
- Customer Type: Select the appropriate customer type from the dropdown menu.
- Registration Type: Choose the registration type relevant to the customer.
- User ID: Fill in a unique identifier for the user.
- Active: Specify whether the customer account is active by selecting "Yes" or "No" from the dropdown.
- Round Off: Select the rounding-off preference for the customer’s transactions.
-
Additional Details:
- Payment Method: Choose the payment method the customer prefers.
- Payment Terms: Specify the agreed-upon payment terms with the customer.
- Credit Limit: Enter any credit limit that applies to this customer’s account.
- Sales Rep/User Group: Assign the relevant sales representative or user group to this customer.
-
Banking Information (optional):
- Reference Number: Provide a reference number if applicable.
- Bank Name: Enter the name of the customer’s bank.
- Bank Account Number: Input the customer's bank account number.
- Bank Address: Add the bank address details.
- Bank Swift Code: Enter the bank’s SWIFT code for international transfers.
- Bank IFSC Code: Provide the IFSC code, especially for Indian customers.
- TDS Account ID: Enter the TDS account ID if required for tax deductions.
-
Additional Notes: Include any notes or specific details relevant to the customer in the "Note" field.
-
Save the Customer: After verifying all information, click on the "Create" button at the bottom of the form to save the customer’s details.
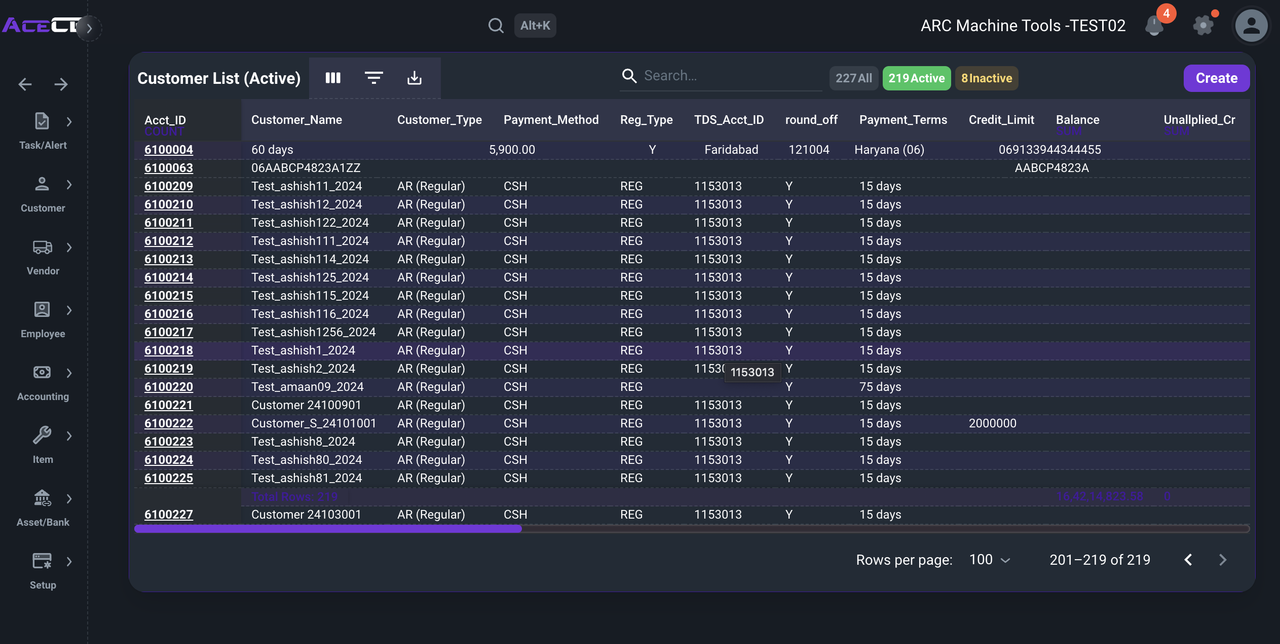
Customer List
Viewing the customer list in Ace CBM is streamlined and user-friendly. With quick filters for active and inactive customers, an intuitive search bar, and detailed information displayed in a structured table, users can easily locate and review customer data. The pagination and row display options further enhance the experience, making it simple to manage large volumes of customer records at a glance.
 To view the customer list in the Ace CBM:
-
Access Customer List: In the Ace CBM dashboard, go to the "Customer" section
-
Filter by Status:
- At the top right, you’ll see the filter options for All, Active, and Inactive customers.
- Click on Active to view only active customers or Inactive to view only inactive ones.
-
Search for a Customer:
- Use the Search bar at the top to type in the Customer Name or Acct_ID to quickly locate a specific customer.
-
Review Customer Information:
- Each row in the table shows detailed information for each customer, including:
- Acct_ID: The unique account ID of the customer.
- Customer Name: The name of the customer.
- Customer Type: Specifies if the customer is a regular or another type.
- Payment Method: The payment method selected for the customer, e.g., cash (CSH).
- Reg Type: Indicates the registration type.
- TDS Acct ID: Displays the tax deduction account ID, if applicable.
- Round Off: Shows if rounding off is enabled.
- Payment Terms: Lists the agreed payment terms (e.g., 15 days).
- Credit Limit: Shows the credit limit assigned to the customer, if any.
- Balance: Displays the customer’s outstanding balance.
- Unapplied Cr: Indicates any unapplied credit for the customer.
- Each row in the table shows detailed information for each customer, including:
-
Navigate Pages:
- Use the pagination controls at the bottom to view additional pages of the customer list, especially if there are many entries.
- Adjust the Rows per page setting to display more or fewer rows at once.
-
View Totals:
- At the bottom of the list, review the Total Rows count, which shows the total number of customers.
- Other summary figures, such as the total balance, may also be visible.